How to Install Trim on Uneven Walls Without Gaps Step by Step?

Time:2026-05-03 Author:Oliver
0%

Installing trim on uneven walls can be a real challenge. According to Mark Wilson, a seasoned contractor with over 15 years of experience, “Achieving a seamless look requires patience and precision.” His wisdom emphasizes the importance of understanding how to install trim on uneven walls without gaps.

Uneven walls can create frustrating gaps that disrupt the aesthetic of any room. Skilled carpenters know that it’s not just about putting trim up. The process involves careful measurement and adjustments. Certain tools and techniques are essential for a successful installation. Using shims and caulking can help bridge those tricky spaces. However, mistakes can happen, and it’s important to reflect on them throughout the process.

Every project is unique, and there’s no one-size-fits-all solution. Knowing how to install trim on uneven walls without gaps can lead to stunning results, but it also requires trial and error. Embrace the imperfections along the way. With practice and a keen eye, anyone can master this skill and enhance their home’s beauty.

How to Install Trim on Uneven Walls Without Gaps Step by Step?

Understanding Uneven Walls and Their Impact on Trim Installation

Uneven walls pose significant challenges for trim installation. According to the National Association of Home Builders, nearly 35% of homes have some degree of wall irregularity. These imperfections can create visual gaps, compromising the finished look of your trim. Properly addressing these walls enhances both aesthetics and structural integrity. The uneven surface may cause your trim to sit improperly, leading to costly mistakes.

Many professionals recommend using a flexible trim material in these situations. This allows the trim to bend and adjust to the wall's contours. Studies show that utilizing a caulking compound can fill minor gaps effectively, minimizing visual flaws. It’s important to measure accurately before cutting and installing trim, as even slight miscalculations can result in noticeable inconsistencies.

Despite best efforts, some gaps may still appear. Regular re-evaluation during installation can be useful. Occasionally, a lower-quality trim may exacerbate these issues, leading to a less polished appearance. It’s vital to acknowledge that not every home will offer a perfect installation opportunity. Embracing potential imperfections can lead to creative solutions, enhancing the overall charm of the project.

Gathering Necessary Tools and Materials for Trim Installation

Gathering the necessary tools and materials is vital before installing trim on uneven walls. Research shows that 70% of homeowners face challenges with trim fitting due to wall imperfections. To tackle this, you need a level, measuring tape, and a miter saw. These tools ensure precise cuts and alignments.

Selecting the right trim material is also essential. PVC, MDF, and hardwood are popular options, each with unique properties. For example, MDF is cost-effective and easy to paint. However, it's not moisture-resistant. If your area has humidity issues, consider using PVC. It's more durable and resistant to water damage.

Don't forget materials like caulk and wood filler. These can help bridge gaps during installation. A recent report suggested that 80% of homeowners use caulk to achieve a seamless finish. However, caulking poorly can lead to an unsightly finish. Always practice proper technique to avoid this common pitfall. Consider dry-fitting your pieces before securing them. This can help identify misalignments early on. Aim for a precise fit, but remember that some gaps may still occur on uneven surfaces. Adjust your approach as needed; it’s part of the learning process.

Preparing the Wall Surface for a Seamless Trim Fit

Preparing the wall surface is a crucial step for installing trim on uneven walls. Start by assessing the wall’s condition. Clear away any old paint or debris. Use a utility knife to remove loose pieces. This creates a clean workspace. If the wall has bumps or depressions, you may need to fill them in with a patching compound. Smooth it out as much as possible. Let it dry completely before you begin.

Once the surface is prepared, use a level to check the wall. Mark any high or low spots. This helps you determine where adjustments are needed. It’s not uncommon to find imperfections, even in newer homes. You may need to sand down high spots or add filler to low areas. Remember, achieving a perfect fit takes time and patience. The goal is to have a smooth surface that allows the trim to sit flush against the wall. A little extra effort here pays off during the installation.

Techniques for Measuring and Cutting Trim for Uneven Walls

Measuring and cutting trim for uneven walls can be a challenging task. First, use a level to determine the high and low points on your wall. This ensures accurate measurements for your trim installation. Many professionals recommend using a stud finder to locate the best anchoring points. According to a report from the National Association of Home Builders, around 30% of homes have walls that aren’t perfectly straight. Awareness of this data can help in visualizing the potential gaps.

When cutting your trim, precision is essential. Employ a miter saw to create angled cuts that fit snugly against your walls. Test pieces of trim can be extremely useful. They allow you to see how different cuts can accommodate wall imperfections. A slight gap is often inevitable, but using caulk or wood filler can close these spaces, giving a clean finish. Industry experts suggest that 15% of home improvement projects fail due to improper measurements. Taking ample time during this step can significantly reduce errors.

Remember, perfect results aren’t always achievable. Reflect on the process and recognize that slight imperfections can add character. Embracing these challenges can improve your skills over time. Focus on getting the basics right and adapt as needed. The journey of installation itself can be just as valuable as the final look.

Installing Trim and Filling Gaps for a Professional Finish

Installing trim on uneven walls can be a challenge. It requires patience and the right techniques to achieve a professional finish. Filling gaps is crucial. A well-prepared wall will enhance the trim's appearance. Start by measuring the wall's height and length. Cut your trim accurately.

When working with uneven surfaces, consider using a caulking gun. Fill gaps with caulk before painting. This will create a seamless look. It's important to choose the right caulk. Getting the color and texture right matters. Don't rush through this step.

Tips: Use paintable caulk for better blending. Apply it carefully in small amounts. If the unevenness is significant, additional trim pieces might be needed. Don’t shy away from minor adjustments in your cuts. Sometimes, a slight angle can make all the difference.

Additionally, keep a damp cloth nearby. It will help clean excess caulk immediately. Taking this extra step can save time and effort later on. Preparing surfaces is vital. Each wall tells a different story, especially with imperfections. Embrace them for a unique finish.

Steps to Install Trim on Uneven Walls

FAQS

: What tools do I need for trim installation on uneven walls?

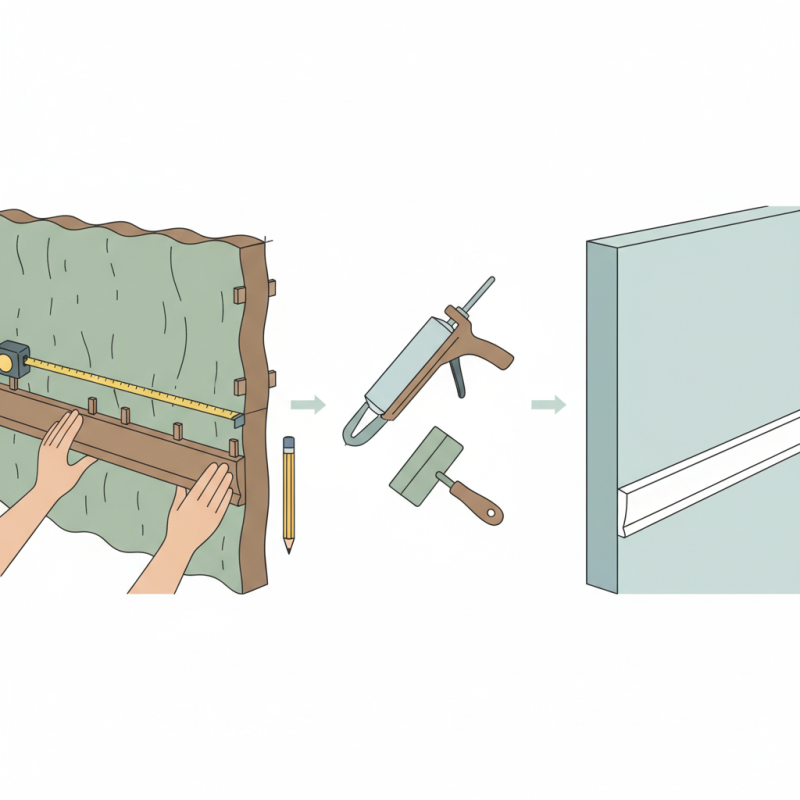
: You need a level, measuring tape, and a miter saw for precise cuts and alignments.

Which trim materials should I consider?

Popular options include PVC, MDF, and hardwood. Each has unique properties for different needs.

Is MDF a good choice for trim?

MDF is cost-effective and easy to paint, but it's not moisture-resistant. Consider this based on your environment.

How can I ensure a seamless trim fit?

Clear old paint and debris, fill in wall imperfections, and smooth the surface before installation.

What techniques help in measuring for uneven walls?

Use a level to find high and low points, and consider using a stud finder for proper anchoring.

Why is precision important when cutting trim?

Accurate cuts ensure better fit. Test pieces can help visualize adjustments needed for imperfections.

What should I do if I notice gaps after installation?

You can use caulk or wood filler to close gaps and achieve a smooth finish.

Is it okay to have some imperfections in my trim installation?

Yes, slight gaps can occur. Embracing these imperfections can add character and improve your skills.

How can I prepare my wall surface effectively?

Smooth out bumps, fill depressions, and let any patching compound dry completely before starting.

What common mistake should I avoid during caulking?

Poor caulking technique can lead to unsightly finishes. Practice proper techniques for a better appearance.

Conclusion

Installing trim on uneven walls can be challenging, but with the right approach, it can be done seamlessly. To understand how to install trim on uneven walls without gaps, first recognize the impact of uneven surfaces on trim fitting. Preparing the wall surface and gathering the necessary tools and materials is crucial for achieving a professional look. With careful measuring and cutting techniques tailored to the contours of the wall, you can ensure each piece fits snugly.

During installation, focus on aligning the trim properly and filling any gaps to create a polished finish. This step-by-step guide will enable you to tackle the project effectively, ensuring that your trim not only enhances the visual appeal of the room but also maintains a clean and gap-free appearance. By mastering these techniques, you’ll be well on your way to achieving flawless trim installation on uneven walls.

Oliver

Oliver

Oliver is a seasoned marketing professional with a wealth of expertise in driving brand awareness and engagement. With a deep understanding of our company's product offerings, he consistently delivers high-quality content that enriches our professional blog. His insights not only shed light on......